Saturday, June 23, 2012

More veggie garden area

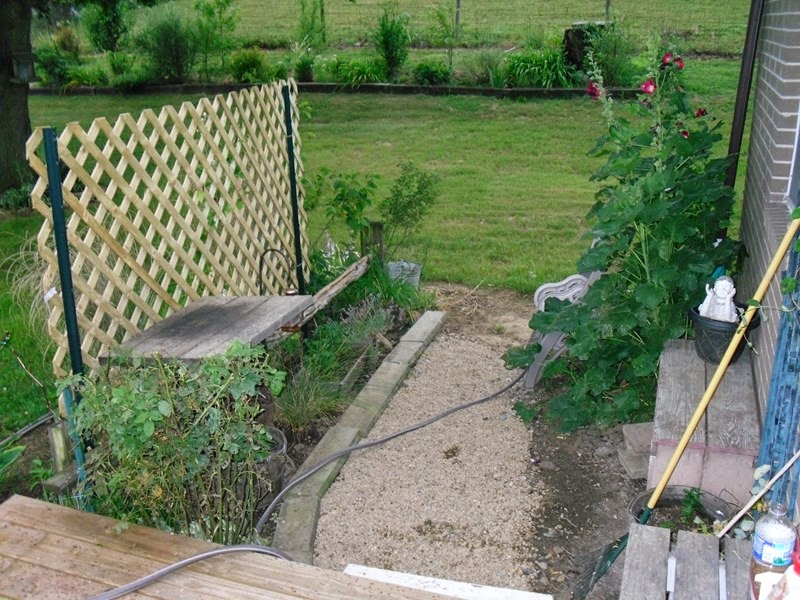
Our little garden plot has overflowed, we now have to stick things in here and there just to get everything growing in the gardens this year
we used the little railroad tie raised bed that used to be the "neighbor pick your own garden" and have turned it into cucumbers in this one, on both sides on fences
in the center by the stump we have celery growing and will be planting some peppers on both sides of the stump later
to the right are the sweet potatoes, perfect spot for some extra gardening

We also have peppers and tomato plants scattered all over in my flower bed strip gardens :)

Thursday, June 21, 2012

Update on lattice under front deck

I've gotten the rest of the lattice up under the front deck and transplanted some plants and moved some garden art into the area
there we go, got the lattice up on this end, moved some ornamental grasses, transplanted some day lilies and also the little dogwood shrubs from the other bed, they were getting too large for their area (the 3 mounds are Kelsey Dwarf Dogwood  cornus sericea "Kelseyii"
closer view, everything liking their new garden space, I have transplanted my "Francesca Marie" clematis behind the little angel
cleaned up the little walkway to side yard from front deck and added a lattice piece for the clematis from my bestest friend Donna, they needed more space to grow than the little split rail fence that was there
 also bought extra lattice for other areas around here, I transplanted more grasses on this one, you can see the clematis are growing up pretty good, well I tied them up to give them a headstart when I added the lattice
 just more of the gardens
 little old bench fits perfect there
 my big blue transplant bucket, it has lugged many plants around this yard
 back porch heads into kitchen, herb planter there
 other end of the back kitchen porch, added new lattice work there, the critters seem to enjoy it, gets a little shade there now
 since I am on the back porch, do you see what I see? Backfire is in the bathroom window! don't ask me HOW she got in that window, but she figure it out, geesh, I should start calling her the stalker cat!
 I have transplanted a "Seven Sisters" rose bush on the left from my mom, in the middle is a climbing hydrangea and on right side that you can't see cuz it's too small is a clematis
 the potato patch is growing really well this year
 herb planter with clematis growing behind it, this is a generic one, jackmanii purple
 all the critters hangin out

yup, there she is, and look at the dirty window, you can tell some kitties have been up there visiting her!!

Wednesday, June 13, 2012

Lattice under front deck

I told you I wanted to put lattice up under my front deck, so today is that day
here is before I got started, need to dig out to slide the critter box in there
 shoveled out the dirt so the box sits under there level, and do you see that tape measure there? yes that is MINE, I have to hide it from the hubby, he loses them left and right, I used to have 3 Stanley 25' tape measures, now I am down to 1 and he has it!! so I bought this one, said it's bright orange so I won't lose it in the yard or if I do at least I can find it easily!
Measure everything good, it makes your job go soo much better trust me!
 daughter behind the camera, she still has not learned to quit taking photos when my big hiney is stickin out, sorry about that
 perfect fit now that I dug it out!!
 measured to get the front lattice up
 then had to get the rocks situated under there so they don't fall off and crush the lattice, when I get the last piece of lattice covering the critter box I will post the end result
and there is Backfire, the only house kitty, well I should say only kitty that is NEVER allowed outside, the other critters all come and go in and out when they please, Backfire follows me from window to window when I am outside working, always in the window

Sunday, June 10, 2012

Weeping cherry tree gets gone

I am sure by now you heard me complain a time or two about the shrubs that were in front of the house and the weeping cherry tree that I didn't like because it was a bug magnet and I just plain did not like it!
 there we go, above photo taken when we were just starting to move plants and things down to house in 2009
 there it is again in 2010 when I got all those gorgeous rocks from the field and you can see that I have already gotten rid of the privets that were all along house below the big living room window (there were 4 of them, they were ok, but I don't like those kinds of shrubs up against the house because of all the bugs they attract
 here it is in 2011 when it's blocking my deck view
scraggley thing yet again in the fall
well, finally it's gone!! woot woot we just cut it down, had it down in 2 minutes flat HA HA
and there it AIN'T NO MORE!!!
created some level or tiers in that garden bed too with some of those rocks from farmers field
 finally a view without that thing, and the bugs are gone
 yes, mama is a happy camper, looks much better already, I was working on killing off the grass that persists in the driveway and you can see from the brown grass it's already working!
and do you see under the end of the deck, right under that blue chair on this end? Well I plan on putting up lattice under the deck, but under that blue chair I want to dig it out so I can put the dog/cat box under there first before I enclose it, they use it rarely but I want it away from all those winds and under the deck is the perfect hide-a-spot HA HA

Tuesday, June 5, 2012

Homemade Strawberry Rhubarb Pie recipe

so sooo many strawberries, I have been canning jam, frozen some for later use, been eating fresh and giving away, but today it's time for a pie!!! Plain ole strawberry pie OR I like to add rhubarb and make a sweet tart pie, depends on your liking and if you have never had strawberry rhubarb pie then you sure don't know what you are missing (and yes the leaves are poisonous on the rhubarb, you just cut them off, been eating rhubarb for over 40 years and I ain't dead yet)
 oooh yeah look at this delicious yummy pie
 I like to use deep dish pie pans for strawberry pies
 so pretty, almost hate to cut into it . . .
 well ~ I said "almost" - see how nice and thick it is, not runny, that's because of the tapioca beads added
it holds together so nice, doesn't fall apart, oh such a taste temptation, see ya! gotta eat this pie LOL

Oh wait, I almost forgot to give you my recipe! Shame on me for torturing you like that!!
It's super awesome and so very simple to make!
Recipe for strawberry rhubarb pie but can be converted to just strawberry pie, directions below

Strawberry Rhubarb Pie
2 crusts (make your own or use those package roll out ones)
3.5 cups rhubarb, cut into 1 inch chunks
3.5 cups strawberries, sliced if big, halved if smaller
1/2 cup sugar
1/4 cup light brown sugar
1 Tablespoon lemon juice
1/2 cup minute tapioca beads (yes 1/2 cup, you won’t have a runny pie)
1/4 teaspoon salt
2 Tablespoons butter

Preheat oven 400*
Stir together rhubarb, strawberries, sugars, lemon, salt and tapioca in large bowl.
Place bottom crust in pie dish.
Mound filling inside bottom crust and add about 4 pats of the butter on top before top crust.
Put the lid on the pie. Pinch your sides and cut slits in top.
Lightly brush a little melted butter on top, sprinkle with sugar (because my daughter loves sugar tops)

Bake for 20 minutes at 400*
turn oven down to 350* and bake an additional 30 minutes or a smidgen longer
until the juices just start to bubble from the slits.

Cool on wire rack.
I put mine in fridge until next day and then cut n eat YUMMY!
*(note – you can eliminate the rhubarb and just use 6 to 7 cups
of strawberries, eliminate the lemon juice but keep all the other ingredients
the same – pie still comes out wickedly good)

Saturday, June 2, 2012

Canning jars get a cleaning

You may remember the post where I was building the root cellar/pantry in the basement and showed you the stack of boxes, all canning jars and supplies, well, it's getting toward canning season so I have them all getting them scrubbed good and packaged and sorted to put back in boxes until I need them, then just a rinse off and sterilize again before use and we are good to go
there we go, all this pile of stuff that needed cleaned to be put away in the new area
have them upstairs to start cleaning and repacking, as we use these throughout the year, we stack in boxes and just take to basement, now we have that root cellar/pantry to put them in, then before canning season we have to get all the jars sorted, checked over for cracks or chips and sort them according to size and whether they are wide mouth or regular, then we get plenty of seals and rings and we are all good to go come August when we usually start our canning
 there we have it folks, all those boxes nicely inspected, cleaned, sterilized and sorted, boxes marked and ready to be put down into the new root cellar/pantry in the basement
aaaaaaaaahhhhhhhhhhh just knowing that is done makes me feel better